Customers
Customers
In the ERP system, a Customer refers to any individual, organization, or business entity that purchases goods or services from your company. The Customers module is a central component for managing all customer-related information, tracking transactions, and ensuring efficient sales, billing, and support processes.
Purpose
The Customers module is designed to:
-
Maintain comprehensive records of all customers.
-
Enable efficient sales management and billing.
-
Track customer transactions, balances, and communication.
-
Facilitate better customer service through historical data access.
Key Features
-
Store detailed customer profiles including contact, address, GST and PAN numbers, and payment preferences.
-
Track all sales transactions, invoices, credit/debit notes, and payments.
-
Set customer-specific pricing, tax rules, and credit limits.
-
Categorize customers by type (individual, business, reseller, etc.).
-
Attach documents such as contracts, agreements, or ID proofs.
-
View customer activity history and communication logs.
-
Export customer data for reporting and analysis.
Customer Fields and Details
When adding or managing a customer, the following key information is maintained:
-
Customer Name
-
Customer Type (Individual / Business)
-
Email Address
-
Phone Number
-
Billing and Shipping Address
-
GST Number (if applicable)
-
PAN Number
-
Payment Terms
-
Credit Limit
-
Customer Status (Active / Inactive)
Steps to Add a New Customer
To add a new customer to the ERP system, follow the steps below:
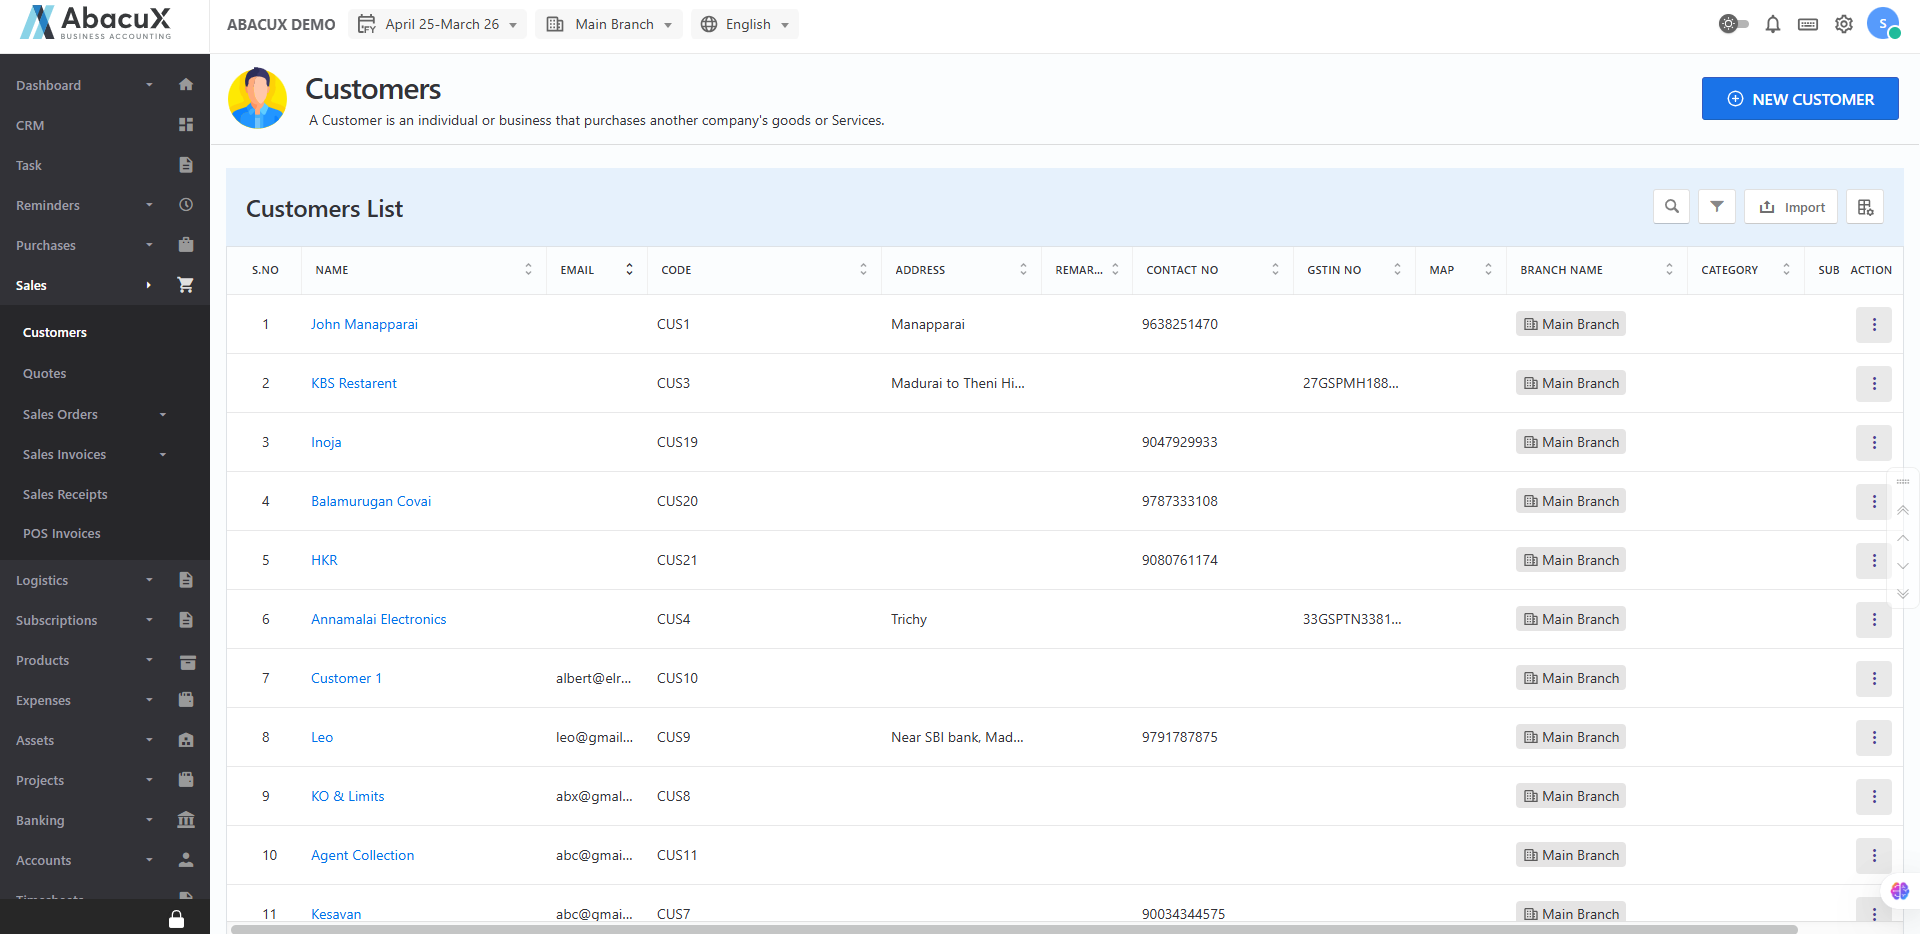
- Navigate to Sales > Customers from the main menu to access the customer list.
-
Click on the "New Customer" button located at the top right corner of the page.
-
Complete the customer entry form by filling in all the required fields such as Customer Name, Email, Phone Number, Address, and any applicable tax details (e.g., GST, PAN).

-
Click "Save" to submit the form.
-
On successful submission, a confirmation message will appear, and the new customer will be added to the list.
-
If there are any validation errors, an error message will be displayed on the form highlighting the fields that need correction.
Managing Existing Customers
From the customer list view, you can:
-
Edit customer details.
-
Delete customers (only if no transactions are linked).
-
View transaction history (sales, payments, notes).
Integration and Usage
-
Customers are automatically linked to sales invoices, payments, and return notes.
-
Customer credit balances and outstanding invoices can be monitored in the dashboard or reports.
-
Useful for CRM (Customer Relationship Management) features when integrated with support or marketing modules.
Best Practices
-
Keep customer data up to date to ensure accurate billing and reporting.
-
Validate GST and PAN numbers for business customers.
-
Set proper credit limits to manage financial exposure.
Import Customers
Customer Import Instructions
The Customer Import feature allows you to bulk upload customer data into the ERP system using a predefined Excel format. This is useful for quickly onboarding multiple customers without manual data entry.
Steps to Import Customers
-
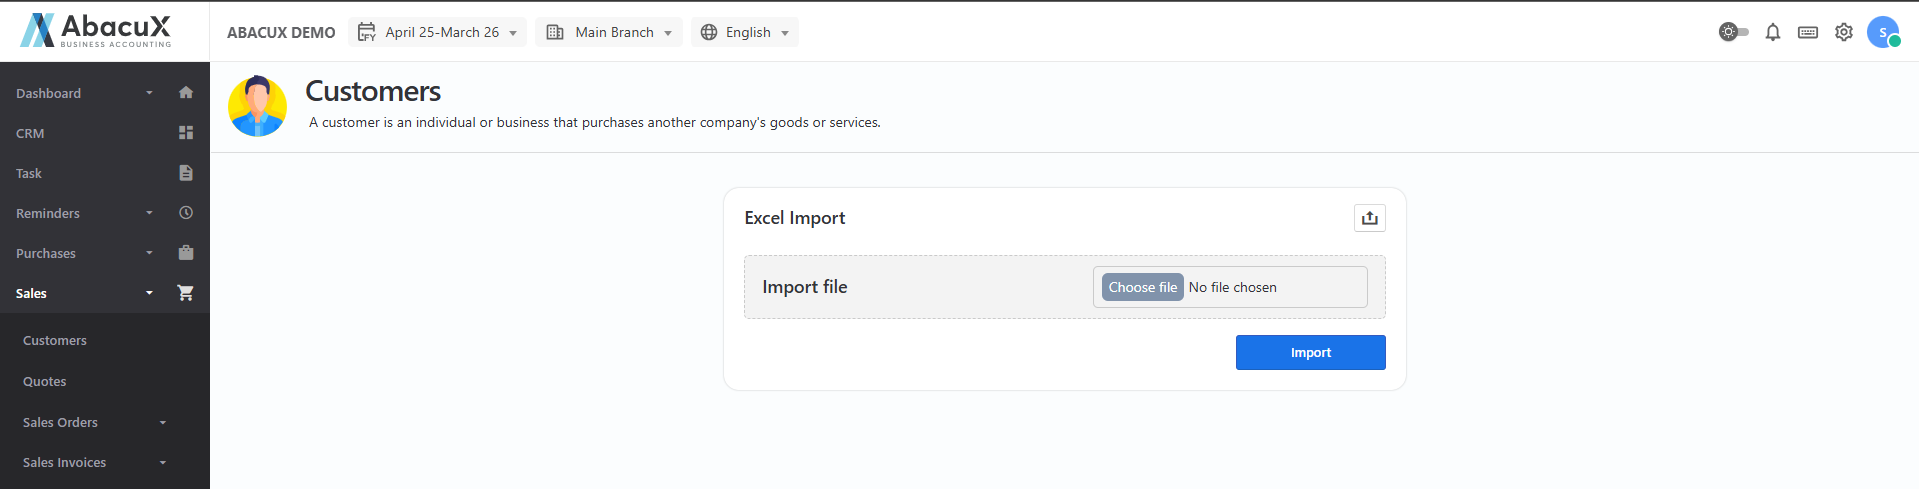
Click the "Import" button on the Customers page to access the customer import screen.
-
Prepare your Excel file with customer data in the required format. Ensure that all mandatory fields (e.g., customer name, email, phone number) are included and properly filled.
-
If you do not have the sample format, click the "Download Sample File" link to download the template. Enter your customer details into this file.
-
Upload the prepared Excel file by selecting it using the file upload option provided.
-
Click the "Import" button to start the upload process.
-
On successful import, a confirmation message will be displayed, and the newly added customers will appear in the customer list.
-
If any errors occur during import, an error message will be shown on the page detailing the issues (e.g., missing required fields, invalid formats). Correct the issues and re-upload the file.
Important Notes
-
Ensure that no mandatory field is left blank.
-
Validate email and contact numbers for correct formatting.
-
Duplicate customer entries will be skipped or flagged based on system settings.
-
All uploaded files should be in .xlsx format.