Vendors
The Vendors Module in your ERP system plays a critical role in managing relationships and transactions with external entities who supply goods or services to your business. A vendor (also referred to as a supplier) can be an individual, organization, or business entity from which your company purchases raw materials, finished goods, or services necessary for its operations.
🧑💼 What is a Vendor?
A Vendor is an individual or a company that offers goods or services to another company. Vendors can provide:
-
Raw materials for manufacturing
-
Finished goods for resale
-
Services such as logistics, IT support, or maintenance
Efficient vendor management ensures uninterrupted supply chains, favorable pricing, and compliance with quality and delivery timelines.
Create new vendor
To create a new vendor in the system under the Purchase menu, follow these steps:
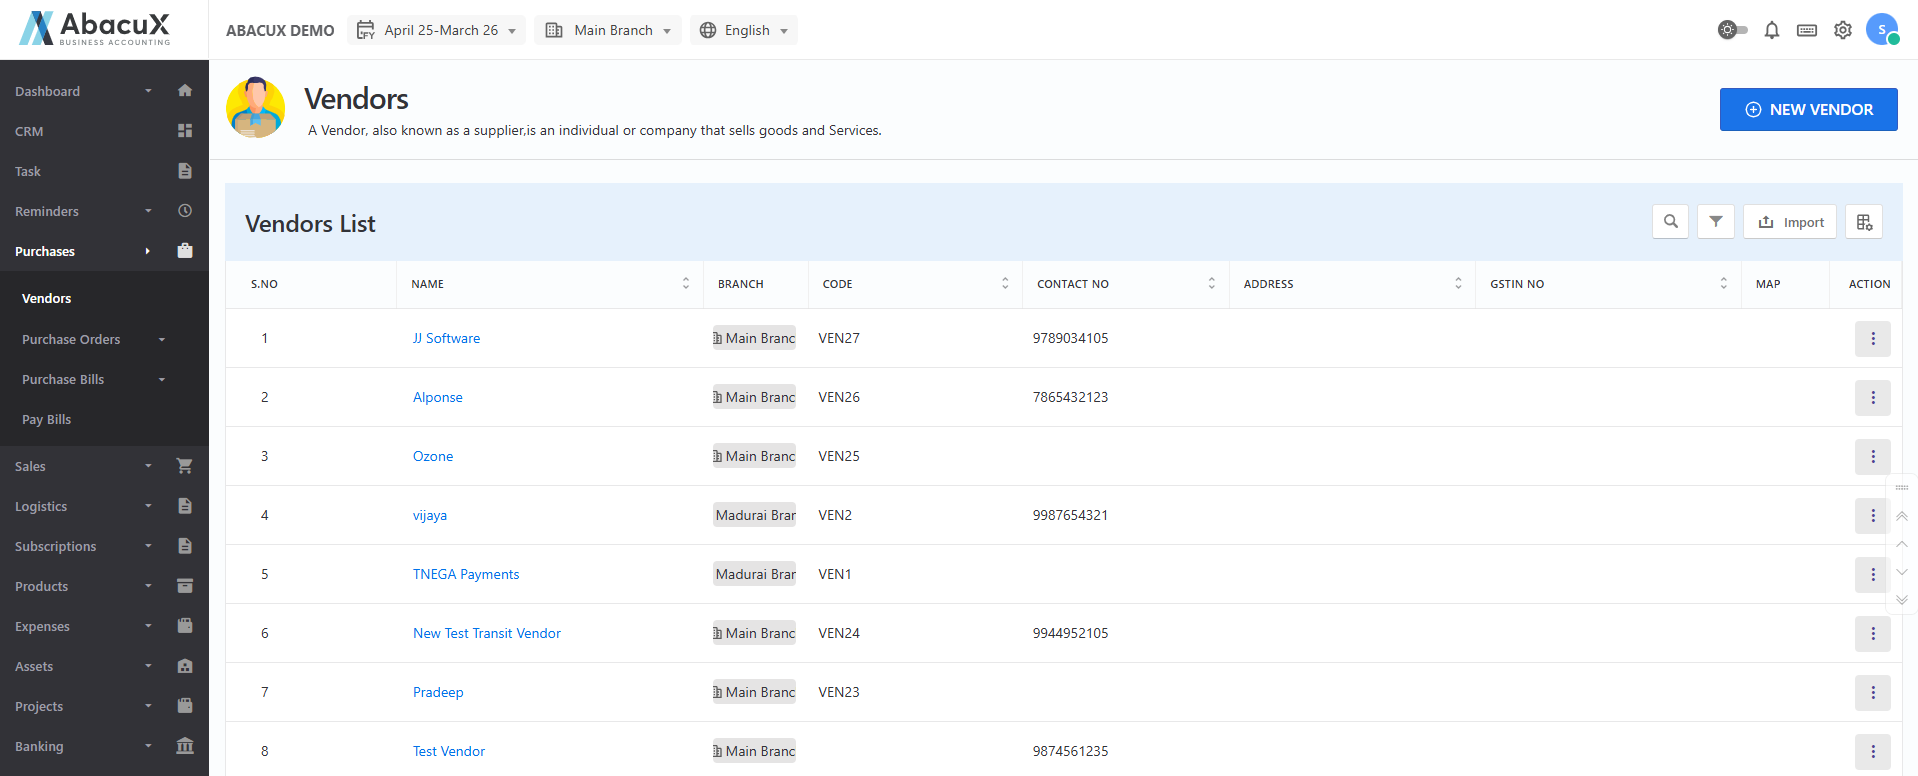
- Navigate to the "Vendors" section from the Purchase menu to view the list of existing vendors.
-
Click on the "New Vendor" button located at the top-right corner of the screen.
-
A popup form will appear, prompting you to enter the necessary details for the new vendor.
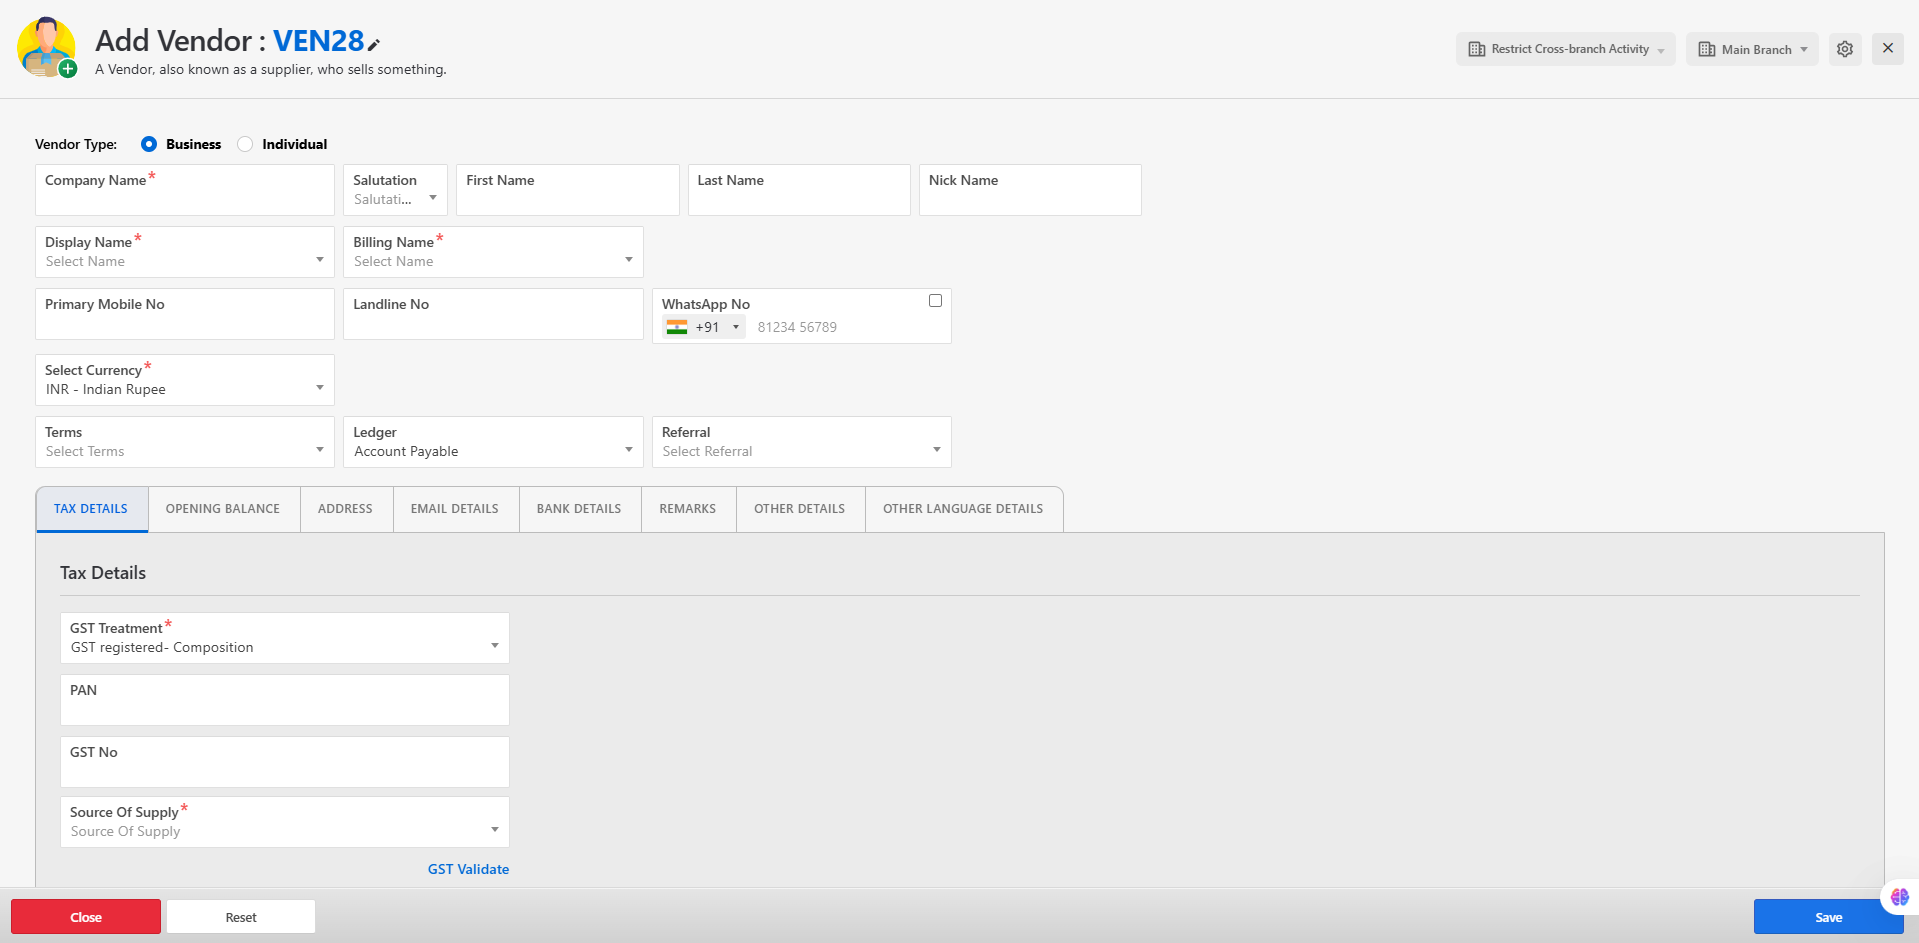
- Fill in all relevant information in the form, including:
-
Tax details
-
Opening balance
-
Address and contact information
-
Email and communication preferences
-
Remarks or internal notes
-
Additional information, including support for other languages (if applicable)
-
After entering all required information, click "Save" to submit the form and create the vendor.
-
Upon successful creation, a success notification will be displayed on the vendor list screen.
-
If there are any validation errors or issues, they will be highlighted within the form for correction.
-
Once the vendor is successfully created, you may proceed to create a branch associated with the new vendor, if needed.
📥 How to Import Vendors in Bulk
To import multiple vendors at once using the Import option, follow these steps:
-
Click the "Import" button. This will open a form allowing you to upload a vendor data file.
-
Download the sample file provided to understand the required format for data import.
-
Enter the vendor details into the sample file, ensuring the data is accurate and follows the required structure.
-
Upload the completed file using the import form and proceed with the import process.
-
If the file is successfully imported, a success message will be displayed, and the newly imported vendors will appear in the vendor list.
-
In case of any errors during the import process, the system will display the error messages on the screen, indicating the issues that need to be corrected.
🔧 Vendor List Functionalities

1. Search Vendors
- Click the search icon to display the search box, where you can search for vendors based on your input criteria.
2. Advanced Filter
- Click the filter icon to open a form with advanced search options. You can filter vendors based on specific fields and conditions.
3. Import Vendors
- Click the import button to import multiple vendors in bulk using a structured file format.
4. Customize Columns
-
Click the column customization icon to view a list of available columns.
-
Check or uncheck the boxes to show or hide specific columns.
-
Drag and drop to rearrange the column order as per your preference.
5. Vendor Actions (⋮ Icon) Click the vertical dots icon (⋮) beside a vendor record to access available actions:
-
Edit – Opens the vendor form where you can modify and update vendor details.
-
Delete – Prompts for confirmation to delete the vendor from the list.
-
View – Opens a detailed view of the selected vendor in a separate screen.