Assets Check IN & OUT
Assets Check IN & OUT
The Assets Check IN & OUT module is designed to manage the movement of assets between the company and other locations, such as customer sites, branches, or field use. It ensures real-time tracking of asset location, status, and accountability.
Purpose
-
Check-Out: To record and track when assets are moved out from the company premises to an external location (e.g., customer site, warehouse, service center).
-
Check-In: To track and confirm the return of those assets back to the company.
Key Features
-
Real-time monitoring of asset transfers.
-
Maintain an audit trail for asset handover and returns.
-
Supports partial or complete check-ins.
-
Option to record recipient details, handover date, and remarks.
Use Case
This feature is particularly useful for:
-
Equipment loan to customers or employees.
-
Asset relocation for project deployment.
-
Temporary movement for servicing or maintenance.
Manage Asset Check-In
- Navigate to the Asset Check-In & Out menu and select the Asset Check-In tab to view the list of checked-in assets.
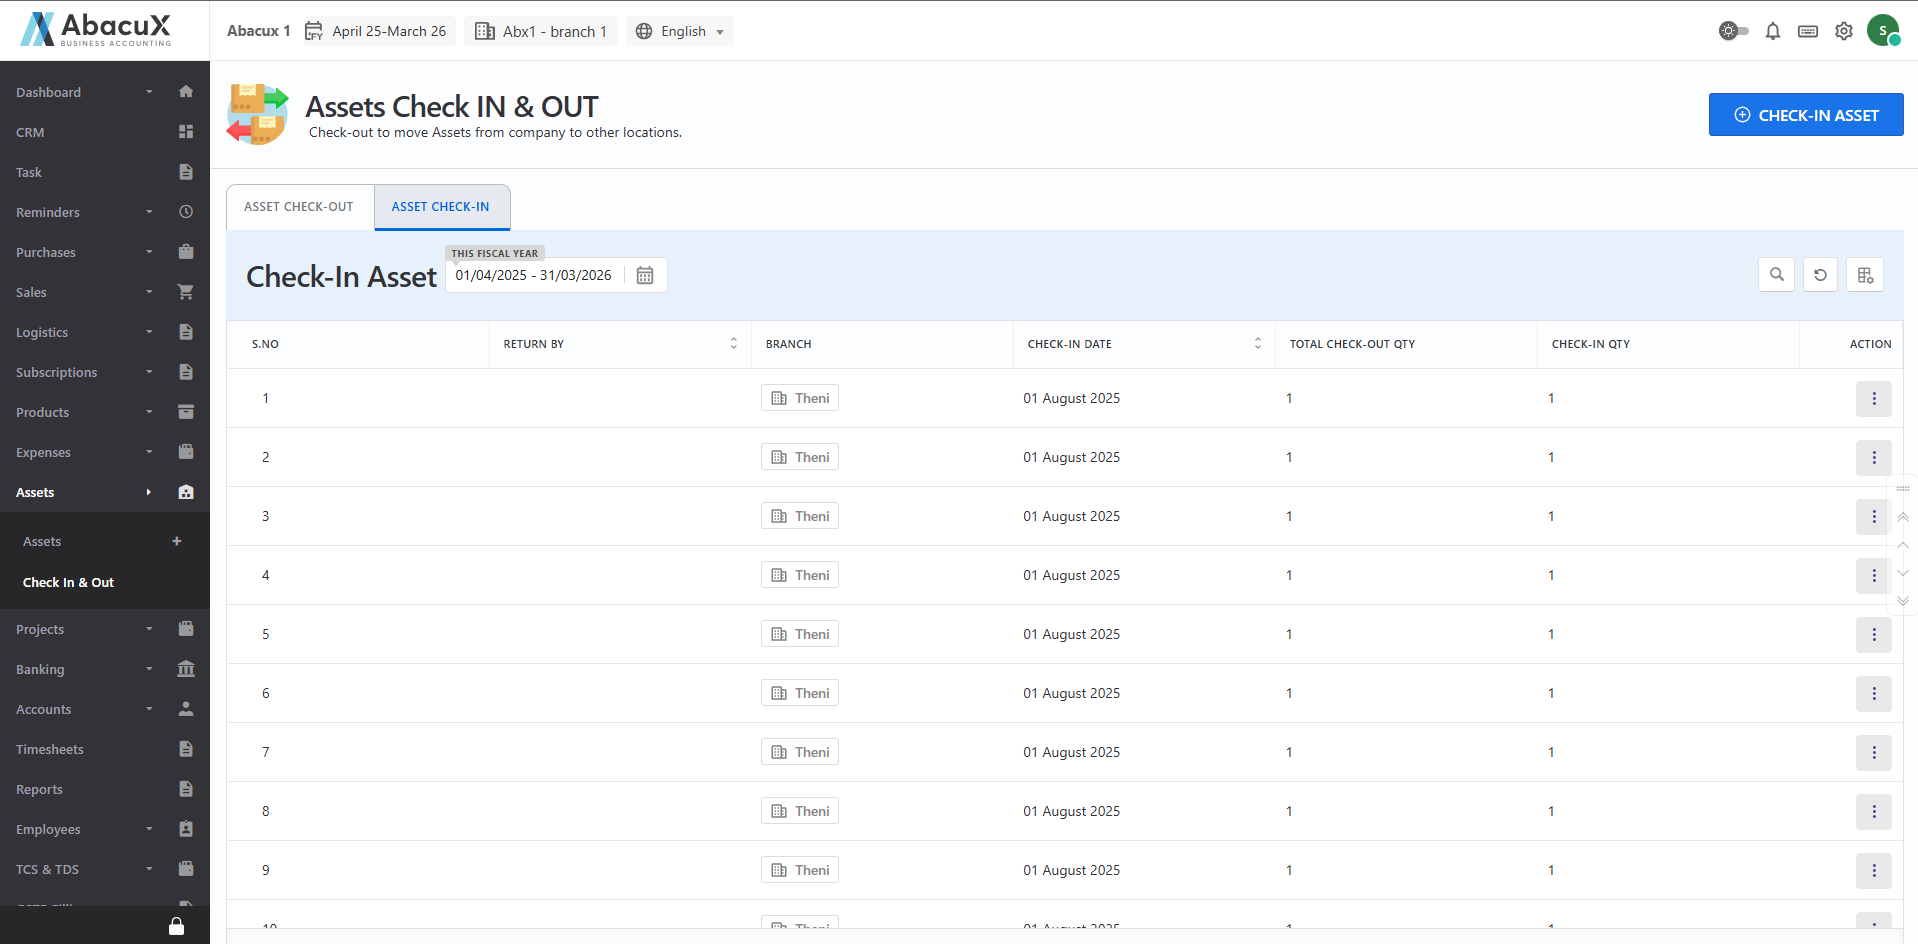
-
To add a new asset check-in, click on the "Check-In Asset" button located at the top-right corner of the page.
-
This will open the asset check-in form where you can enter the required details.
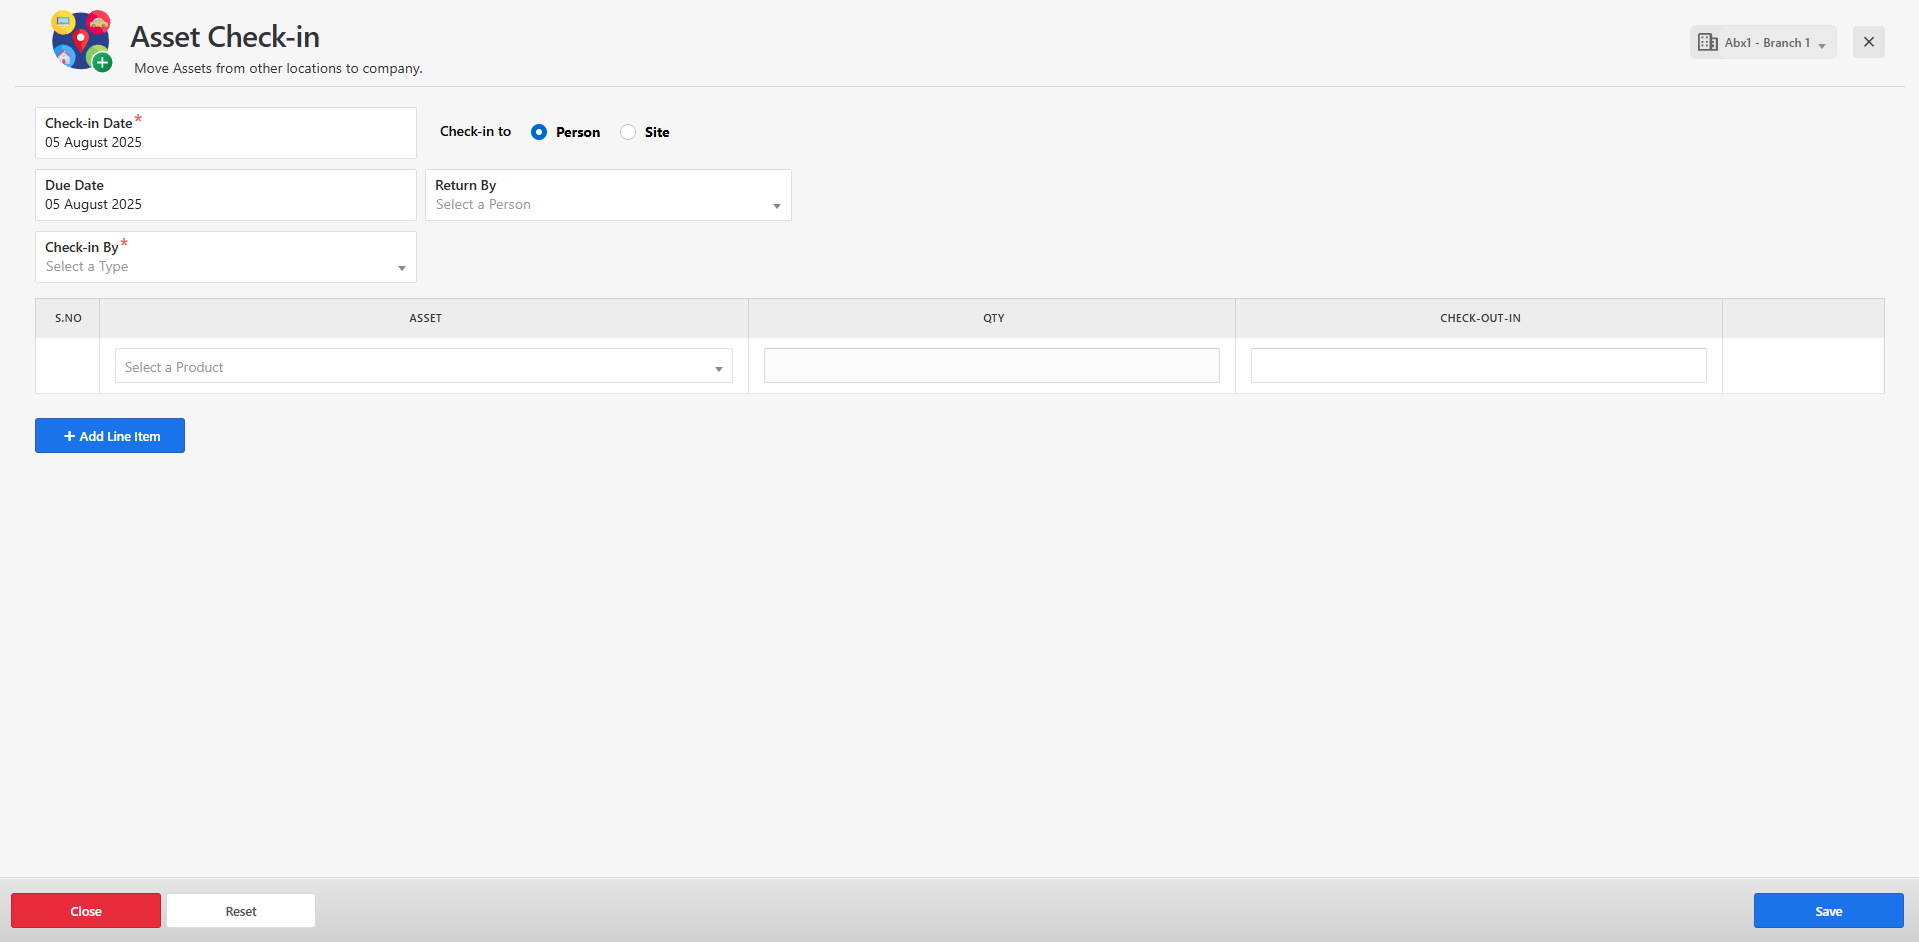
-
Fill in all the necessary fields and click Save to complete the check-in process.
-
If the form is saved successfully, a success message will be displayed on the listing page.
-
If there is an error while saving the form, an error message will be shown on the form itself.
-
You can manage the check-in list using the following actions:
-
Edit
-
Delete
-
Manage Asset Check-Out
- Navigate to the Asset Check-out tab to view the list of checked-out assets.

-
To add a new asset check-out, click on the "Check-Out Asset" button located at the top-right corner of the page.
-
This will open the asset check-out form where you can enter the required details.
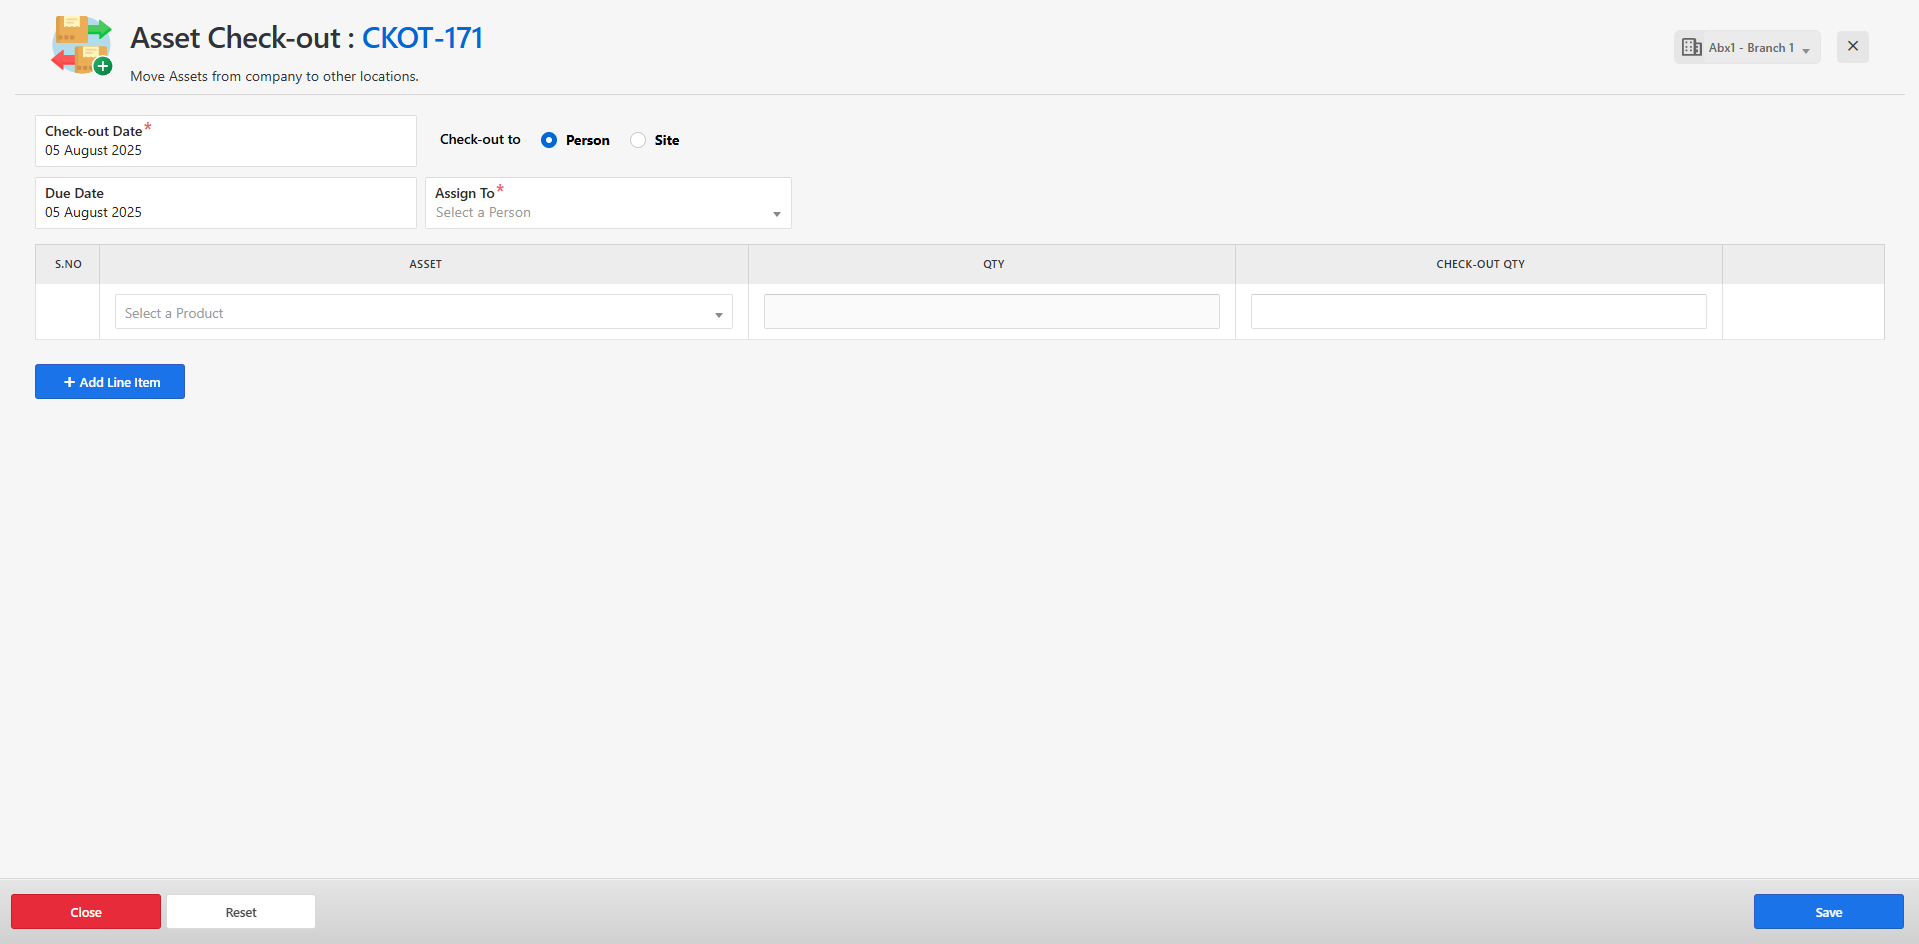
-
Fill in all the necessary fields and click Save to complete the check-out process.
-
If the form is saved successfully, a success message will be displayed on the listing page.
-
If there is an error while saving the form, an error message will be shown on the form itself.
-
You can manage the check-out list using the following actions:
-
Edit
-
Delete
-